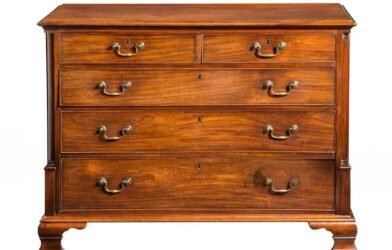
Refinishing a dresser is a fantastic way to breathe new life into an old piece of furniture, turning it into a stunning addition to your home. Whether you’ve picked up a thrift store find or want to revive a family heirloom, this DIY project is both rewarding and budget-friendly. With the right tools and techniques, anyone can achieve a professional-quality dresser makeover. It walks you through every step of the process, from preparation to finishing touches, ensuring your refinished dresser looks beautiful and lasts for years.
Why Choose a Dresser Makeover?
A dresser makeover is an excellent way to refresh your home decor without spending a fortune. Instead of buying new furniture, refinishing allows you to customize an existing piece to match your style, whether it’s modern, rustic, or vintage. This process not only saves money but also reduces waste, making it an eco-friendly choice. By refinishing, you can repair scratches, dents, or outdated finishes, creating a unique piece that reflects your personality. The satisfaction of completing a DIY project adds to the appeal, making it a fulfilling endeavor for both beginners and seasoned crafters.
Benefits of Refinishing a Dresser
Refinishing a dresser offers several advantages that make it a worthwhile project. It’s far more affordable than purchasing new furniture, often costing less than $50 depending on the materials you use. You have complete control over the look, from choosing colors to updating hardware, allowing for endless customization. Upcycling old furniture is also sustainable, keeping usable pieces out of landfills. Most importantly, the process is empowering, giving you a sense of accomplishment when you see the transformed dresser in your space.
Tools and Materials for Refinishing a Dresser
Before diving into your dresser refinishing project, gather all the necessary tools and materials to ensure a smooth workflow. Having everything ready saves time and prevents interruptions. You’ll need a screwdriver or drill to remove hardware, an orbital sander or sanding sponges in various grits (80, 120, and 220), and paintbrushes for applying stain or paint. A small paint roller works well for smooth surfaces, while a putty knife is handy for scraping. A tack cloth or cheesecloth is essential for cleaning dust, and a drop cloth protects your workspace. Safety gear, including nitrile gloves, safety goggles, and a NIOSH-approved respirator, keeps you protected during sanding or chemical use. For materials, you’ll need wood stripper, wood filler or Bondo for repairs, mineral spirits for cleaning, and a wood-specific primer if painting. Choose high-quality paint or wood stain, polyurethane for sealing, and optional new hardware or spray paint to refresh existing knobs.
Step-by-Step Guide to Refinish a Dresser
Refinishing a dresser requires careful preparation and attention to detail, but the process is straightforward if you follow these steps. Each stage is designed to help you achieve a polished, durable finish that elevates your furniture.
1. Set Up Your Workspace
Start by choosing a well-ventilated area, like a garage or outdoor space, to work safely. Lay down a drop cloth to catch drips and protect surfaces. Wear safety goggles, gloves, and a respirator to shield yourself from dust and fumes. A clean, organized workspace makes the refinishing process more efficient and prevents accidents.
2. Disassemble the Dresser
Remove all hardware, such as knobs and pulls, using a screwdriver or drill. Place them in a labeled bag to avoid losing pieces. Take out the drawers and set them aside, as this makes sanding and painting easier. Disassembling the dresser ensures you can access every surface for a thorough makeover.
3. Clean the Surface
Cleaning the dresser is crucial to remove dirt, grease, or grime that could interfere with your finish. Mix TSP cleaner with warm water according to the package instructions and wipe down all surfaces with a sponge. Rinse with plain water to remove any residue, then let the dresser dry completely. A clean surface ensures better adhesion for paint or stain.
4. Repair Imperfections
Examine the dresser for scratches, dents, or cracks. For minor damage, apply wood filler with a putty knife, smoothing it evenly. For larger repairs, like chipped corners, use Bondo for a stronger fix. Allow repairs to dry fully, then sand them smooth with 120-grit sandpaper. This step ensures a flawless base for your finish.
5. Strip the Old Finish
If the dresser has thick paint or varnish, you’ll need to strip it. Apply a safe wood stripper, like Citristrip, with a foam brush, working in small sections. Let it sit for 15–30 minutes until the finish bubbles, then scrape it off with a plastic putty knife. Use a wire-bristle brush for crevices. Wipe the surface with mineral spirits to remove any leftover stripper, leaving a clean surface for the next steps.
6. Sand for a Smooth Surface
Sanding is key to a professional dresser makeover. Begin with 80-grit sandpaper to remove any remaining finish or rough spots, sanding along the wood grain. Move to 120-grit for smoothing, then finish with 220-grit for a polished surface. Wipe away dust with a tack cloth after each round to keep the surface clean. Proper sanding ensures paint or stain adheres evenly.
7. Apply Primer for Painting
If you’re painting, apply a wood-specific primer with a brush or roller in thin, even coats. This creates a smooth base and helps paint adhere better. Let the primer dry for 2–4 hours, checking the product label for exact times. Lightly sand with 220-grit sandpaper between coats for an ultra-smooth finish. One or two coats are usually enough.
8. Paint or Stain the Dresser
For painting, select a durable latex or chalk paint. Apply thin coats with a brush or roller, using a spray bottle with water to smooth out brush marks if needed. Allow each coat to dry for 4–6 hours before adding another. Two coats typically provide full coverage. For staining, stir the wood stain well and apply it with a foam brush, following the grain. Wipe off excess stain after 5–10 minutes for your desired shade. Test the stain on a hidden area first, like inside a drawer, and let it dry for 8–24 hours.
9. Seal with Polyurethane
Protect your dresser with a clear polyurethane topcoat to make it water-resistant and durable. Apply it with a foam brush in thin layers, sanding lightly with 220-grit sandpaper between coats to remove imperfections. Two or three coats are ideal, with 4–6 hours of drying time per coat. Keep drawers slightly open during drying to prevent sticking.
10. Refresh the Hardware
For a cohesive look, consider replacing old knobs with new ones that match your style, such as modern pulls or vintage brass handles. Alternatively, spray-paint existing hardware in a complementary color. If new hardware requires different placement, drill pilot holes carefully. Securely attach the hardware for a polished finish.
11. Reassemble and Final Check
Reattach the hardware and slide the drawers back into the dresser. Ensure the drawers glide smoothly, adjusting if necessary. Inspect the dresser for any missed spots or uneven areas, touching up as needed. Your refinished dresser is now ready to shine in your home.
Creative Ideas for a Unique Dresser Makeover
To make your dresser stand out, consider adding creative touches. Apply adhesive wallpaper to drawer fronts for a pop of pattern. Use stencils to paint designs or words for a personalized look. A two-tone finish, with the body in one color and drawers in another, creates a striking contrast. Decoupage with decorative paper, like maps or florals, adds a unique flair. Swapping out hardware for sleek or ornate options can completely change the dresser’s vibe.
Tips for a Professional Finish
For the best results, test paint or stain colors on a hidden area first. Always apply thin layers to avoid drips and ensure even coverage. Don’t rush drying times, as patience prevents smudging or bubbling. Invest in quality brushes and sealants for a smoother, longer-lasting finish. Sanding between coats is a small step that makes a big difference in achieving a professional look.
Conclusion
Refinishing a dresser is a satisfying DIY project that transforms old furniture into a stunning, personalized piece. By following this step-by-step guide, you can achieve a professional-quality makeover, even if you’re new to furniture refinishing. From cleaning and sanding to painting and sealing, each step is designed to be approachable yet effective. The result is a dresser that not only looks beautiful but also reflects your style and creativity. Start your dresser makeover today and enjoy the pride of creating a one-of-a-kind piece for your home.