Living off the grid offers a unique sense of freedom from rising utility costs and unreliable power grids. An off grid solar system harnesses sunlight to generate electricity which you store for use at any time even during the night or cloudy days. This comprehensive guide explains every step to build your own off grid solar system covering planning selecting components installing and maintaining. Whether you’re powering a remote cabin a mobile van or a small home this setup is adaptable. Success requires careful planning and steady effort especially if you’re new to solar systems. Begin with a modest setup and expand as you gain experience. Safety remains critical at every stage to avoid risks and ensure a reliable system. Follow this guide to create a dependable solar solution that meets your energy needs.
Off grid solar systems are increasingly popular due to lower costs for panels and batteries. Advances in technology have made these systems more efficient and accessible. This guide provides practical tested steps to help you succeed. Written to be clear and user-friendly it equips you with everything needed to start your off grid journey confidently.
What is Off Grid Solar Systems
To begin you must understand how an off grid solar system operates independently of utility power lines. It relies entirely on sunlight to fuel your energy needs through stored power.
What Is an Off Grid Solar System?
An off grid solar system uses solar panels to capture sunlight and convert it into direct current electricity. A charge controller directs this power to batteries which store the energy for later use. An inverter transforms the stored direct current into alternating current to power household devices such as lights chargers or small appliances. The system depends on additional components like wires mounts and connectors to function as a cohesive unit.
Why Choose Off Grid Solar?
Going off grid saves money over time by eliminating electric bills entirely. The system ensures power availability during outages or in remote locations where grid access is unavailable. It reduces dependence on fossil fuels contributing to a cleaner environment. By controlling your own energy supply you gain confidence and security in any situation.
Plan Your Off Grid Solar System
Planning is the foundation of a successful off grid solar system. You need to determine your power requirements and evaluate your location to ensure the system meets your demands effectively.
Determine Your Energy Needs
Start by listing all devices you plan to power and find their wattage on labels or in manuals. Note how many hours each device runs daily and multiply watts by hours to calculate watt-hours for each device then sum these to get your daily total energy consumption.
Include All Devices
For example a 50-watt fan running six hours daily consumes 300 watt-hours. A 15-watt light used for four hours adds 60 watt-hours. Add up all devices to determine your daily energy need and be precise to avoid underestimating your requirements.
Plan for Future Expansion
Consider future devices you might add such as a pump or additional appliance. Include an extra 20 percent in your total to account for potential growth and inefficiencies in wiring or panels that can reduce overall system performance.
Assess Your Location
Check the average sunlight hours in your area since sunny regions provide around five hours of strong light daily while cloudier areas may offer only three. Use online tools to find your region’s sunlight average and plan for reduced sunlight during winter months. Inspect your site for shade from trees buildings or hills that could block sunlight and choose an open location for your panels. Face panels south in the northern hemisphere and tilt them to match your area’s latitude to optimize sunlight capture.
Choose the Right Components
Selecting components that align with your energy plan is crucial and each part must work together seamlessly. Quality components ensure durability and long-term performance.
Solar Panels
Choose panels based on your daily watt-hour needs by dividing your total by the average sun hours to determine the required wattage. Add 20 percent to cover losses from dust clouds or inefficiencies. Monocrystalline panels are ideal for limited spaces as they generate more power per square foot. Decide how many panels you need and verify their voltage and current ratings match other system components. Opt for reputable brands to ensure reliability and longevity.
Batteries
Select batteries to store energy for use during dark or cloudy periods. Lithium batteries outlast lead-acid options and store more power in less space making them a better choice for most systems. Plan for enough capacity to cover at least two days of energy use to handle bad weather. Choose a system voltage such as 12 or 24 volts since higher voltages reduce wiring requirements. Connect batteries properly to achieve the desired voltage.
Charge Controller
A charge controller is essential to protect batteries from overcharging by regulating power flow from panels. MPPT controllers are more efficient than PWM models as they extract more power from panels. Match the controller’s size to your panel output in amps and volts to ensure compatibility and optimal performance.
Inverter
An inverter converts direct current to alternating current to power your devices. Pure sine wave inverters provide stable clean power suitable for most appliances. Size the inverter to handle your peak load when multiple devices run simultaneously to avoid overloading.
Supporting Components
Gather wires fuses and mounts to complete the system. Use thick wires to minimize power loss and include fuses to protect against electrical faults. Mounts must secure panels firmly against wind or storms to ensure stability.
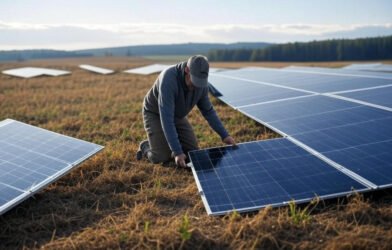
Install the Solar Panels
Begin installation by mounting panels in a sturdy sunny location to maximize energy collection.
Mount the Panels
Attach mounts to a roof or ground structure by drilling into strong beams for stability and seal holes to prevent leaks. Lift panels carefully and secure them with bolts. Set the tilt angle to capture maximum sunlight and consider seasonal adjustments if feasible. Work cautiously to avoid falls or injuries during this process.
Wire the Panels
Connect panels together using series wiring to increase voltage or parallel wiring to boost current. Use standard connectors for easy reliable links and run wires to the charge controller keeping them as short as possible to reduce power loss.
Verify Connections
Ensure positive terminals connect to positive wires and negative to negative since incorrect connections can damage equipment. Test all connections with a multimeter before powering on the system to confirm proper wiring.
Set Up the Battery Bank and Inverter
Place batteries in a cool dry space with ventilation if required for certain battery types.
Connect the Batteries
Wire batteries to match your system’s voltage using series connections to increase volts or parallel connections to add capacity. Use identical batteries for balance and tighten connections securely. Install fuses between batteries for safety and ground the system to prevent electrical shocks.
Install Controller and Inverter
Mount the charge controller near the batteries and connect panels to its input and batteries to its output. Adjust settings to match your battery type for optimal charging. Link the inverter to the batteries using heavy cables and power it on only after all connections are secure. Check for any error indicators to ensure proper operation.
Ensure Safety
Wear protective gear such as gloves and safety glasses during wiring. Keep power off while making connections and verify all links to prevent sparks or electrical shorts that could damage the system.
Test and Maintain the System
Test the system after installation using a multimeter to check each component and confirm correct voltages and currents. Maintain the system regularly by cleaning panels monthly to remove dust which can reduce efficiency. Inspect wires for wear or damage and test battery health frequently replacing faulty components promptly. Monitor energy usage and adjust habits or add capacity if power runs short to keep the system reliable.
Conclusion
You now have a clear roadmap to set up an off grid solar system by planning thoroughly selecting quality components and installing with precision. Regular testing and maintenance ensure consistent performance. This system grants you energy independence requiring initial effort but delivering significant savings and freedom over time. Start your off grid journey with confidence knowing you have the tools to succeed.