Living off the grid offers a unique sense of freedom, and setting up solar panels for off-grid use is a practical way to achieve energy independence. Whether you’re powering a remote cabin, a tiny home, or simply aiming to cut ties with utility companies, an off-grid solar system harnesses the sun’s energy to meet your power needs. In 2025 advancements in solar technology have made these systems more efficient and accessible than ever before. This guide provides a detailed, step-by-step process to help you plan select components install and maintain your off-grid solar system.
Understanding Off-Grid Solar Systems
Before diving into the installation process, it’s essential to grasp what an off-grid solar system entails and how it differs from other setups. This foundational knowledge will guide your decisions throughout the project.
What Is an Off-Grid Solar System?
An off-grid solar system is a standalone power solution that operates independently of the public electricity grid. Solar panels capture sunlight and convert it into electricity, which is then stored in batteries for use when the sun isn’t shining. A charge controller regulates the flow of electricity to prevent battery damage, and an inverter converts the stored DC power into AC power suitable for household appliances. Unlike grid-tied systems, which feed excess power back to the utility company, off-grid systems rely entirely on the energy you generate and store. This means you must carefully calculate your energy needs and ensure your system is sized correctly to avoid power shortages or unnecessary expenses.
Why Choose Off-Grid Solar?
Going off-grid offers several advantages, particularly for those in remote areas or seeking energy independence. You’re not affected by power outages or rising utility costs, which provides peace of mind and financial stability. Additionally, off-grid solar systems are environmentally friendly, reducing your reliance on fossil fuels and lowering your carbon footprint. Over time, the initial investment can lead to significant savings, as you eliminate monthly electricity bills. For many, the ability to live sustainably and independently makes the effort of setting up an off-grid system well worth it.
Environmental and Financial Benefits
By using solar energy, you contribute to a cleaner planet. Solar power is renewable and produces no emissions, unlike coal or gas-powered plants. This choice supports global efforts to combat climate change and promotes a sustainable future. Financially, off-grid solar systems lock in your energy costs, shielding you from unpredictable utility rate hikes. While the upfront cost can be substantial, the long-term savings often make it a wise investment, with many systems paying for themselves within 5 to 10 years, depending on your energy usage and system size.
Planning Your Off-Grid Solar System
Proper planning is the cornerstone of a successful off-grid solar setup. Without a clear understanding of your energy needs and the right components, you risk underperforming systems or overspending on unnecessary equipment. Taking the time to plan carefully will save you time and money in the long run.
Calculating Your Energy Requirements
The first step in planning is determining how much electricity you need daily. Begin by listing all the appliances and devices you plan to power, such as lights, refrigerators, fans, or water pumps. Check the wattage rating on each item, typically found on a label or in the user manual. Multiply the wattage by the number of hours you use each device daily to calculate watt-hours. For example, a 100-watt fridge running for 10 hours consumes 1,000 watt-hours per day. Add up the watt-hours for all your devices to get your total daily energy requirement. To account for inefficiencies in the system, such as energy loss during conversion, add a buffer of 20 to 30 percent to your total. You should also consider seasonal variations, as heating or cooling needs may increase during winter or summer. Online energy calculators can simplify this process, but manual calculations ensure accuracy.
Next, research the average daily sun hours in your location, as this affects how much energy your panels can generate. Areas with 4 to 6 hours of peak sunlight require larger panel arrays to meet the same energy needs as sunnier regions. If your property has shade from trees or buildings, factor this into your calculations, as it reduces panel efficiency. Accurate energy assessments prevent the common mistake of underestimating your power needs, which can lead to system failures during periods of low sunlight.
Choosing the Right Components
Once you know your energy requirements, select components that match your needs. Each part of an off-grid solar system plays a critical role, and quality directly impacts performance and longevity. Look for components with strong warranties, as these indicate durability and manufacturer confidence.
Solar Panels
Solar panels are the heart of your system, capturing sunlight to generate electricity. Monocrystalline panels are a popular choice for off-grid setups due to their high efficiency and compact size, making them ideal for areas with limited space. When selecting panels, ensure their total wattage can meet your daily energy needs within the available sun hours. For example, if you need 5,000 watt-hours daily and have 5 hours of sunlight, aim for a 1,000 to 1,500-watt panel array to account for inefficiencies. Choose panels with at least a 20-year warranty and consider expandable options if you plan to increase your energy use later.
Batteries
Batteries store the energy generated by your panels for use at night or during cloudy weather. Deep-cycle batteries, such as lithium-ion or lead-acid, are designed for off-grid systems because they can handle repeated deep discharges. Lithium-ion batteries, particularly lithium iron phosphate (LFP), are preferred for their long lifespan, safety, and minimal maintenance. Size your battery bank to store enough energy for 1 to 3 days of use, ensuring you have power during periods of low sunlight. For instance, a 10 kWh battery bank can support a 5 kWh daily load for two days without recharging. Check the battery’s voltage and capacity to match your system’s requirements.
Charge Controller
The charge controller regulates the electricity flowing from the panels to the batteries, preventing overcharging or damage. Maximum Power Point Tracking (MPPT) controllers are highly efficient, extracting more energy from panels compared to Pulse Width Modulation (PWM) controllers, which are better suited for smaller systems. Choose a controller rated for your panel array’s voltage and current, and ensure it’s compatible with your battery type. Most controllers allow you to set specific parameters for optimal charging, so follow the manufacturer’s guidelines to maximize performance.
Inverter
An inverter converts the DC electricity stored in your batteries into AC electricity for household appliances. Pure sine wave inverters are recommended for off-grid systems because they provide clean, stable power suitable for sensitive electronics like computers or medical equipment. Size your inverter to handle your peak load, which is the maximum power you use at any one time, such as when multiple appliances run simultaneously. For example, if your fridge, lights, and a pump draw 2,000 watts together, choose an inverter with at least 2,500 watts to handle surges. Place the inverter close to the batteries to minimize energy loss through wiring.
Installing Your Off-Grid Solar System
With planning complete and components selected, it’s time to install your system. This process requires basic tools like screwdrivers, wire cutters, and a multimeter, along with safety gear such as gloves and goggles. Work in dry conditions and follow safety protocols to avoid accidents.
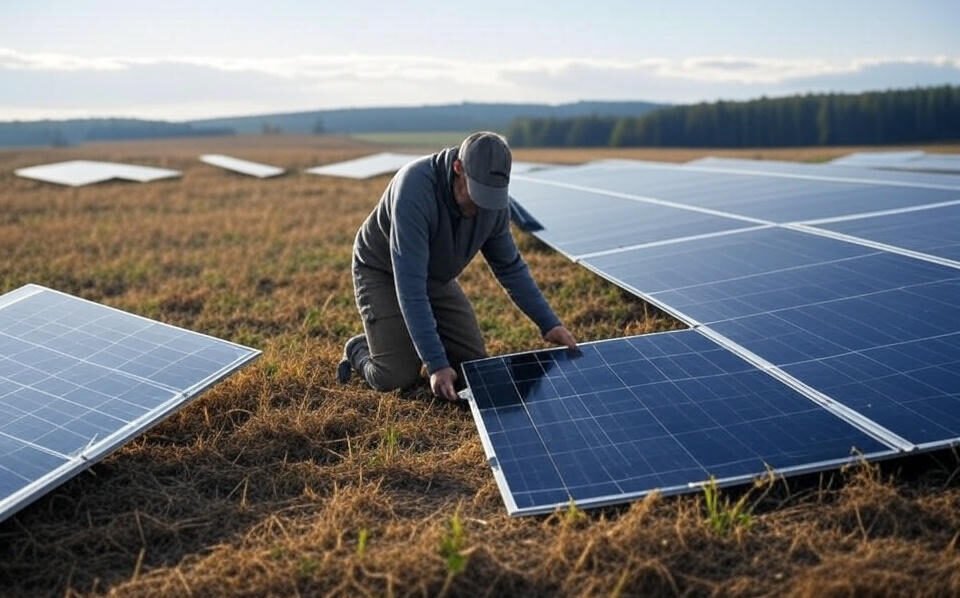
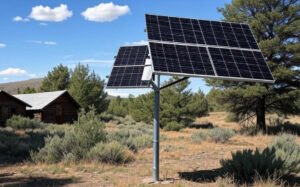
Mounting the Solar Panels
Choose a location with maximum sunlight exposure, free from shade caused by trees, buildings, or other obstructions. Rooftops or ground-mounted racks are common choices, depending on your property. In the northern hemisphere, face the panels south to capture the most sunlight throughout the day. Set the tilt angle equal to your location’s latitude for optimal year-round performance. For example, if you’re at 35 degrees latitude, tilt the panels at 35 degrees. Secure the panels using sturdy mounting brackets, ensuring they can withstand wind and weather. Drill holes carefully and seal them to prevent leaks if mounting on a roof. Enlist help to lift heavy panels safely, and connect them in series or parallel based on your system’s voltage requirements.
Setting Up the Battery Bank
Place your batteries in a well-ventilated, temperature-controlled area to prolong their lifespan. Extreme heat or cold can reduce battery efficiency, so avoid garages or sheds prone to temperature swings. Connect the batteries in series to increase voltage or parallel to increase capacity, depending on your system design. Use high-quality, thick cables to minimize energy loss, and tighten all connections securely. Label positive and negative terminals to avoid confusion, and use a multimeter to verify correct wiring before proceeding. Proper battery setup ensures reliable energy storage and safe operation.
Connecting the Charge Controller
Install the charge controller between the solar panels and batteries. Always connect it to the batteries first, then to the panels, to avoid damaging the controller. Configure the settings according to your battery type, such as lithium or lead-acid, to optimise charging. Most modern controllers display voltage and charging status, so monitor these during initial setup to ensure everything functions correctly. A properly installed controller protects your batteries and maximises energy capture from the panels.
Installing the Inverter
Mount the inverter near the battery bank to reduce cable length and energy loss. Connect the DC inputs to the batteries, ensuring correct polarity. Ground the inverter to prevent electrical hazards. Once connected, test the inverter to confirm it delivers stable AC power. If your system includes a monitoring app, use it to check performance. The inverter is the final link in delivering usable power to your home, so ensure it’s sized correctly for your needs.
Wiring the System
Use colour-coded wires—red for positive and black for negative—to avoid mistakes. Run wires through conduit to protect them from weather and physical damage. Install fuses or circuit breakers on positive lines to prevent fires in case of a short circuit. Keep wire runs as brief as possible to minimise energy loss. Connect the system in this order: panels to charge controller, charge controller to batteries, and batteries to inverter. Double-check all connections before powering on to ensure safety and functionality.
Adding Safety Features
Safety is critical for a long-lasting off-grid solar system. Install circuit breakers to cut power in case of faults, and use a grounding rod to protect against lightning strikes. Surge protectors on major lines add an extra layer of security. Label all switches and components clearly for easy troubleshooting. Regularly inspect your system for loose connections or wear, especially after storms. These measures keep your system safe and operational for years.
Testing and Maintaining Your System
After installation, test the system thoroughly to ensure it works as expected. Turn on each component one at a time, starting with the charge controller, then the inverter. Use a multimeter to check voltage at key points, such as the battery terminals and inverter output. Monitor the charge controller’s display to confirm the batteries are charging properly on sunny days. If your system includes a monitoring app, use it to track performance over time.
Maintenance is straightforward but essential. Clean solar panels monthly to remove dust or debris that reduces efficiency. Inspect wiring and connections annually for signs of corrosion or loosening. Check battery levels regularly to avoid deep discharges, which can shorten their lifespan. Lithium-ion batteries typically last 10 to 15 years, while lead-acid batteries may need replacement every 5 to 7 years. Keep a log of system performance to spot trends or issues early. Addressing problems promptly, such as shading from new growth or loose connections, ensures consistent power output.
Conclusion
Setting up an off-grid solar system is a rewarding project that offers energy independence, cost savings, and environmental benefits. By carefully planning your energy needs, selecting high-quality components, and following proper installation steps, you can build a reliable system that powers your home for years. Start with a small setup if you’re new to solar, and expand as you gain confidence. With the right approach, off-grid solar not only meets your power needs but also contributes to a sustainable future. Take the first step today and enjoy the freedom of generating your clean energy.
FAQs
How much does it cost to set up an off-grid solar system?
The cost depends on system size, ranging from $10,000 for small setups to $50,000 for larger homes. Prices vary based on panel quality, battery type, and installation complexity.
Can an off-grid solar system power an entire house?
Yes, with proper sizing, you can power a whole house. Calculate your energy needs and invest in enough panels and batteries to meet demand, while reducing high-power appliance use.
What happens during cloudy days with off-grid solar?
Panels generate less power on cloudy days, but a well-sized battery bank provides backup. Aim for 2 to 3 days of storage to ensure uninterrupted power.
For more articles: https://quicktrends.co/