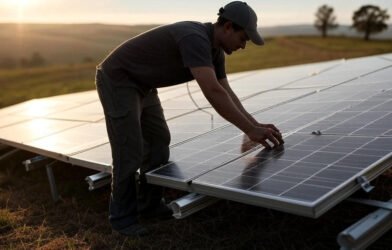
Polycarbonate roof panels are widely used in residential and commercial construction due to their strength, flexibility, and weather resistance. Whether you are installing them on a patio, greenhouse, or carport, this guide provides a detailed, step-by-step process to ensure a secure and long-lasting installation.
Benefits of Polycarbonate Roof Panels
Polycarbonate panels are preferred over traditional roofing materials for several reasons. They are highly durable and can withstand harsh weather conditions, including heavy rain, hail, and strong winds. Unlike glass, they are shatterproof, making them a safer option. These panels also provide excellent thermal insulation, helping to maintain indoor temperatures. Additionally, they are available in different transparency levels, from fully clear to opaque, allowing for customized light control.
Pre-Installation Preparation
Before starting the installation, proper planning is essential. Begin by measuring the roof area to determine the number of panels required. Ensure the supporting structure, whether made of wood or aluminum, is sturdy enough to hold the panels. Check local building codes to confirm any specific requirements for roof installations. Gather all necessary tools and materials in advance to avoid interruptions during the process.
Step-by-Step Installation Process
Measuring and Cutting the Panels
Accurate measurements are crucial for a seamless installation. Use a measuring tape to mark the dimensions on the polycarbonate panels. When cutting, a fine-toothed saw or a utility knife works best to ensure clean edges. Always wear protective gloves and eyewear to prevent injuries.
Attaching the Panels to the Frame
Start by placing the first panel at the edge of the roof structure. Use screws with rubber washers to secure the panels, as they prevent water leakage. Drill holes slightly larger than the screws to allow for thermal expansion. Maintain a consistent gap between panels to accommodate expansion and contraction due to temperature changes.
Sealing the Joints and Edges
To enhance waterproofing, apply silicone sealant along the edges and joints of the panels. This step prevents water seepage and prolongs the lifespan of the roof. Ensure the sealant is evenly spread and free from gaps.
Final Inspection and Maintenance Tips
Once all panels are installed, inspect the roof for any loose screws or gaps. Clean the surface with a mild detergent and soft cloth to remove dust and debris. Regular maintenance, such as checking for cracks and reapplying sealant when necessary, will keep the roof in optimal condition.
Common Mistakes to Avoid
One of the most frequent errors is overtightening screws, which can cause panel cracking. Another mistake is neglecting to account for thermal expansion, leading to warping over time. Improper sealing can also result in leaks, so always ensure edges are properly covered with sealant.
Conclusion
Installing polycarbonate roof panels is a straightforward process if done correctly. By following this guide, you can achieve a durable, weather-resistant, and aesthetically pleasing roof. Proper planning, precise measurements, and careful sealing are key to a successful installation.
FAQs
How Long Do Polycarbonate Roof Panels Last?
High-quality polycarbonate panels can last up to 20 years or more with proper maintenance.
Can Polycarbonate Panels Withstand Heavy Snow?
Yes, they are strong enough to handle snow loads, but proper support framing is essential.
Do Polycarbonate Panels Yellow Over Time?
UV-coated panels resist yellowing, but low-quality ones may discolor after prolonged sun exposure.
Are Polycarbonate Roof Panels Fire-Resistant?
They are not fireproof but have a high resistance to flames and are self-extinguishing.Learn to install polycarbonate roof panels with our step-by-step guide. Ensure a durable, weather-resistant roof for patios or greenhouses.


